


|
|
|
 |
![]()
When adjusting a Bezier curve, too, let's begin at the place to like.
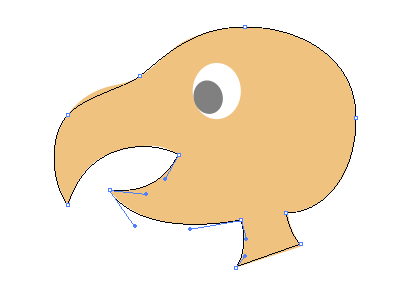 ( Figure 9 )
The Direct Selection tool ![]() from the hit to have begun to draw this timeIt uses and it corrects in
turn.
from the hit to have begun to draw this timeIt uses and it corrects in
turn.
By the segment unit, adjust a control handles on either side and let's
take a balance.As for this, the adjustment ended just now to the bill below.(
Figure 9 )
![]()
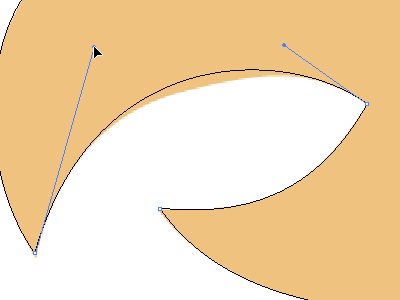 ( Figure 10 )
It is the inside of the bill above.A center in the segment had been roughly
upset when adjusting a control handle with either side, too, and adjusting
the neighborhood of the anchor points to the sketch.( Figure 10 )
![]()
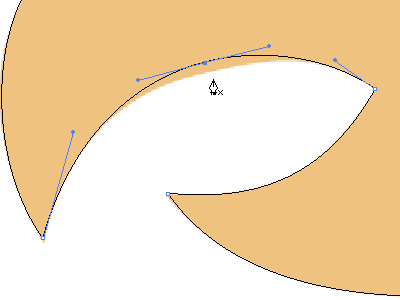 ( Figure 11 )
Because the pushing off came somewhere however it adjusted control handles,
it added an anchor point with the Pen tool.( Figure 11 )
![]()
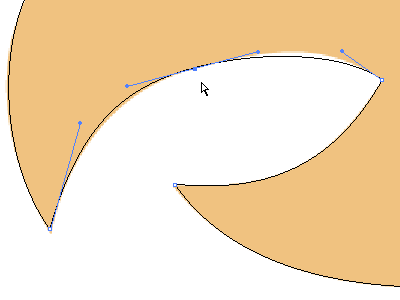 ( Figure 12 )
Make an anchor point move by the Direct Selection tool ![]() and let's adjust a control handle after that.( Figure 12 )
and let's adjust a control handle after that.( Figure 12 )
![]()
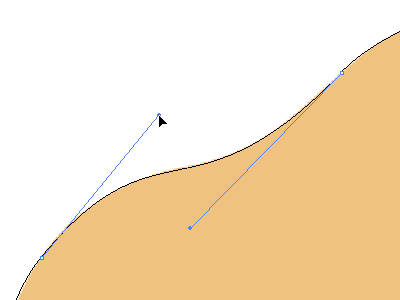 ( Figure 13 )
This is the base of the bill above ( Figure 13 ).Because the control handles
became long, the one which added one anchor point to the center of the
segment may be better.
![]()
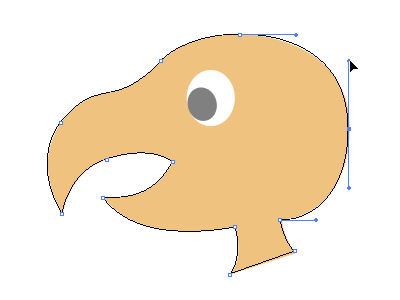 ( Figure 14 )
It is adjusting the form of the occiput.( Figure 14 )This time, the crack
had formed above.
![]()
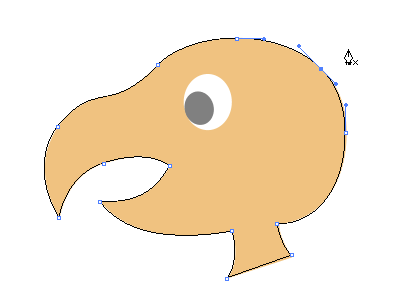 ( Figure 15 )
It added an anchor point to the part at this crack.( Figure 15 )
![]()
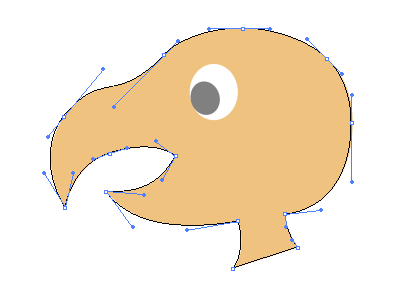 ( Figure 16 )
It corrected the position of the added anchor points and all adjustments ended.Later, it is completion, drawing eyes.( Figure 16 )
The figure ( figure 17 ) below is in the condition of the end of the 11th lecture, the Bezier curve before adjustment.When attempting to compare, it thinks that it finds how where changed.
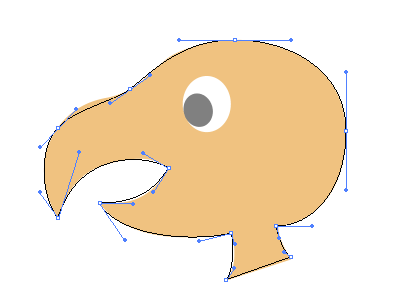 ( Figure 17 )
To want to attempt to practice actually in Adobe Illustrator download an image below.
Copyright(c)2004-2006 D Factory. All rights reserved.